Product Information | Perfect Binding
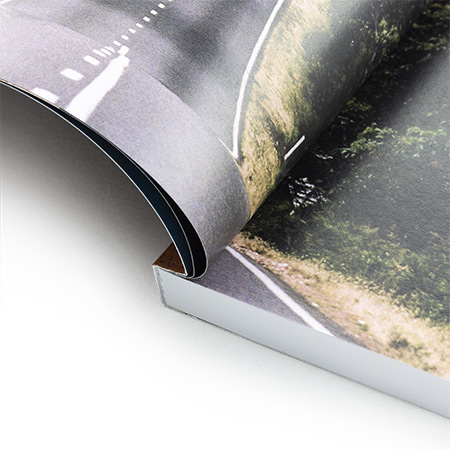
Perfect binding is a form of booklet making in which the cover and pages are bound along the spine using adhesive. All of our books are glued using super strong PUR adhesive which is significantly stronger and more durable than regular EVA adhesives. Perfect binding is similar to burst or notch binding and is ideally suited to larger books from 48 pages to over 300 pages.
Perfect Bound Books have specific artwork set up instructions. It is very important that your artwork is created as per the instructions outlined below to ensure your artwork is correctly supplied.
Are you looking for online pricing?
We offer cheap Perfect Bound Book prices, priority dispatch options and simple online ordering.
PUR adhesive explained
All of our perfect bound books are glued with PUR (polyurethane reactive) adhesive. PUR adhesive is much more durable than other glues (including EVA). PUR adhesive induces a chemical reaction which occurs during cure time. It is this elongated cure time which creates a distinct performance advantage (especially when used in conjunction with coated papers).
PUR adhesive is more durable and flexible than standard EVA glue and once the adhesive has set, it is almost impossible to tear a page out of a PUR-bound book. Books adhered with PUR adhesive are also considerably more flexible which allows them to lie much flatter without compromising the binding strength.

Stock Options
Cover Stocks:
(All covers stocks come with either Matt, Gloss or Velvet laminate for extra durability)
- Gloss Artboard: 250gsm, 350gsm
- Matt-Satin Artboard: 250gsm, 350gsm
- Recycled Matt-Satin Artboard: 250gsm, 350gsm
Internal Pages Stocks:
- Uncoated Bond: 100gsm, 140gsm
- Recycled Uncoated Paper: 100gsm, 120gsm
- Linen Uncoated Paper: 100gsm
- Gloss Artpaper: 115gsm, 150gsm, 170gsm
- Matt-Satin Artpaper: 115gsm, 150gsm, 170gsm
- Recycled Matt-Satin Artpaper: 150gsm
How to supply artwork for perfect bound books
All artwork should be supplied as PDF files with the cover and internal/text pages supplied as separate files.
Detailed instructions on how to set up artwork for the front & back cover and internal pages can be found by expanding the sections below.
Creating Artwork for the Front & Back Cover
- The outside front and back cover must be supplied as a two page spread (see diagram below).
- The cover must contain 3mm of internal and external bleed.
- The cover artwork must include the correct spine width. Spine widths differ depending on the stock type and number of pages in the book. Spine widths can be found by following the instructions in the ‘Spine Width’ section below.
- E.g. If a 48pp + cover A4 portrait book (printed on 100gsm uncoated bond) has a 3mm thick spine, the artwork size for the front and back cover would need to be: 420 x 297mm + 3mm Spine = 423 x 297mm (+ 3mm of external bleed on each edge).
- Due to a 1-2mm tolerance in the folding, binding and gluing processes, where possible we advise against:
- Placing text on the spine (particularly for narrow spine widths).
- Designing your artwork to line up flush along the spine and the front or back cover.
- If artwork is supplied like this, variances during the printing/binding process may be exaggerated which can result in the spine showing on the front or back cover after binding.
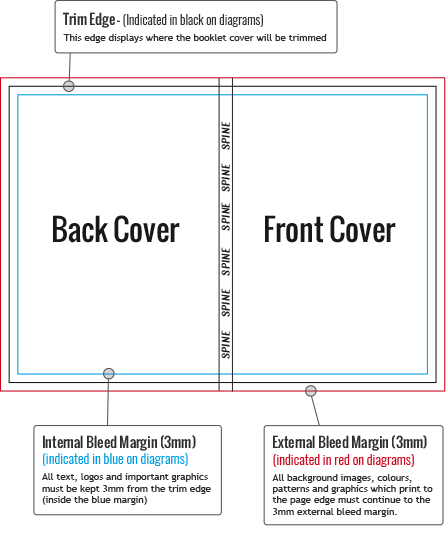
Diagram: How to supply artwork for front and back cover including additional spine (click to enlarge):
Creating artwork for the inside Front and Back cover
- Artwork for the inside front and back cover must be supplied as a two page spread (see diagram below).
- The inside front and back cover must contain 3mm of internal and external bleed.
- The inside front and back cover artwork must include the correct spine width. The spine width will be identical to the outer front and back cover.
- Due to adhesion requirements, the spine must be kept completely free of all artwork.
- Also as due to adhesion requirements, a 5mm strip either side of the spine must be kept completely free of all artwork (see diagram below).
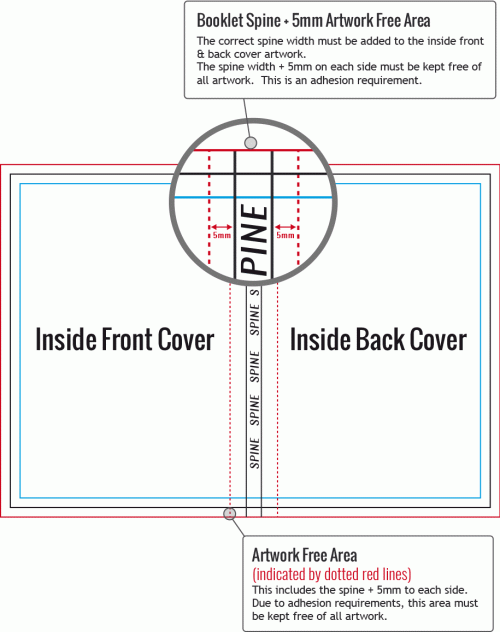
Diagram: How to supply artwork for the inside front and back cover including spine and artwork free area (click to enlarge):
Creating Artwork for the Internal/Text Pages
- The internal pages must be supplied as a 1-Up multiple page PDF file.
- Due to adhesion requirements, on the first page and last page, the first 5mm next to the spine (a narrow strip) must be kept free of all artwork (see diagrams below).
- All text pages must contain 3mm of internal and external bleed.
To ensure text or important graphics are not obscured by the spine/binding, we recommend all such elements be placed no closer than 20mm (10mm at an absolute minimum) to the binding edge. - Please make sure that artwork is supplied at the correct page size.
E.g. If you are ordering A4 magazines, please do not supply A5 size artwork. - Please ensure that your artwork has the correct number of pages.
E.g. If you are ordering a 60pp book, your supplied artwork needs to have exactly 60 pages. If your design has less than 60 pages please add blank pages to make up the required amount. - Due to the nature of perfect binding, we do not recommend text elements are placed across page spreads. Elements which are are placed across page spreads may not line up exactly in your finished book.
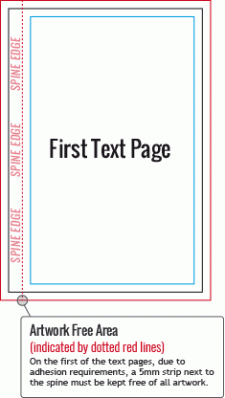
Diagram: How to supply artwork for the first text page (click to enlarge)
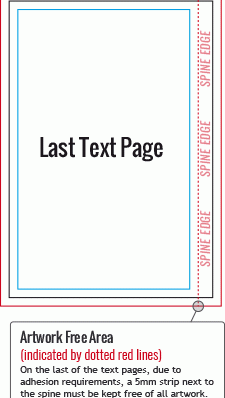
Diagram: How to supply artwork for the last text page (click to enlarge)
Perfect Binding Spine Widths
Spine widths are shown on the Order Details page during the online checkout process.
To lookup a spine width, you will need to choose your print specifications and then commence the online checkout process by following the instructions below.
If you have any questions, or if you need assistance with this process, or if you would like us to manually lookup a spine width for you, please email print@cmykonline.com.au or contact us by clicking here and one of our team will gladly help you out!
Step 1: Navigate to the Perfect Binding Product Page
Please navigate to our perfect bound books product page by clicking the button below:
Then select the product you require (e.g. Priority Dispatch or Standard Dispatch).
Step 2: Select your Product Specifications
On the product page, select the print specifications you require (including quantity) in the ‘Instant Pricing Calculator’.
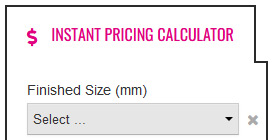
Then click ‘Select Quantity & Get Price’.

Then click the ‘Add to Cart’ button to add your item to the shopping cart.

In the popup message, please click ‘OK’.
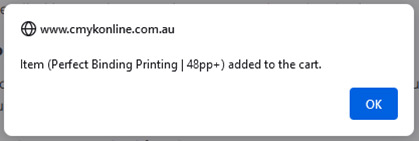
Step 3: The Shopping Cart
Click the shopping cart icon to open your cart.
Then click the ‘Checkout’ button to proceed to the Order Details page.
You may be prompted to login, or to create an account if you do not have a login.

Step 4: Order Details and Product Specifications
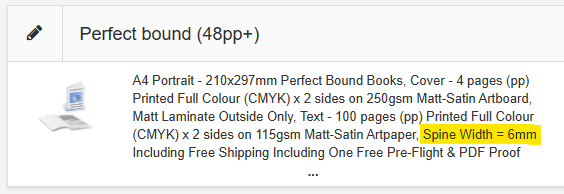
On the Order Details page, the product description will show the spine width. E.g. as per the example screenshot below:
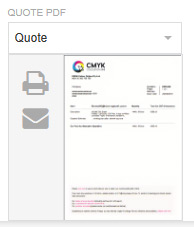
The spine width is also shown in the quote PDF. This can be viewed by scrolling to the bottom of the page and click the quote PDF thumbnail.
Step 5: Calculating the artwork size including spine width
To calculate the cover size including spine width you will need to take the flat size of the cover then add the spine width.
E.g. If you are printing an A4 Portrait book with a 3mm spine,
- The flat size of the cover would be: 210 x 297mm x 2 = 420 x 297mm
- Then add the spine width: 420 x 297mm + 3mm Spine = 423 x 297mm
For further information on how to setup cover artwork (including bleed requirements) please click here.
If you have any questions, or if you need assistance with this process, or if you would like us to manually lookup a spine width or cover size for you, please email print@cmykonline.com.au or contact us by clicking here and one of our team will gladly help you out!
If you still have questions, or cannot find what you are looking for in the resources provided above, please contact us by clicking here and one of our team will get back to you promptly.
